
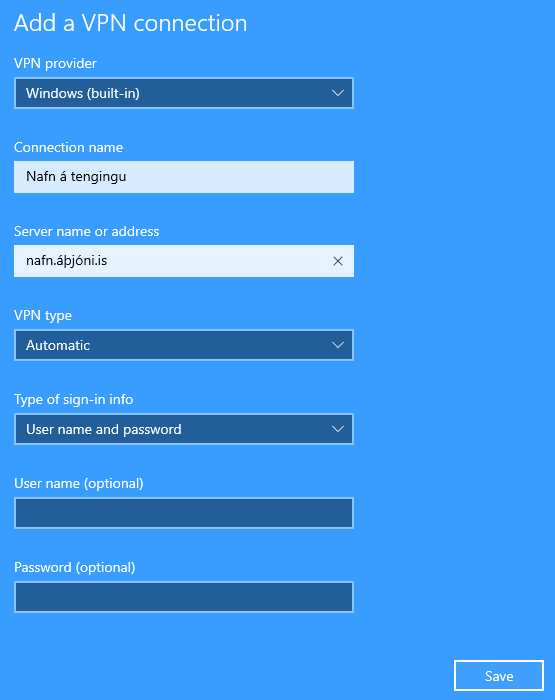
Uppsetningu á VPN er best að byrja í „Settings“ í Windows 10
- Opna network & Internet

- Velja „VPN“ úr vinstri valmyndinni

- Smella á „Add a VPN connection“

- Fylla út „Connection name“ og „Server name or address“ með viðkomandi upplýsingum, velja „Windows (built-in)“ í „VPN provider“ og „VPN type“ sem „Automatic“ og smella svo á „Save“
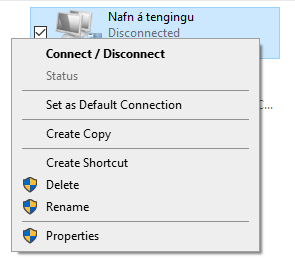
- Smella næst á „Change adapter options“ undir „Related settings“ í hægri valmynd

- Hægri smellið svo á tenginguna sem búinn var til og veljið „Properties“
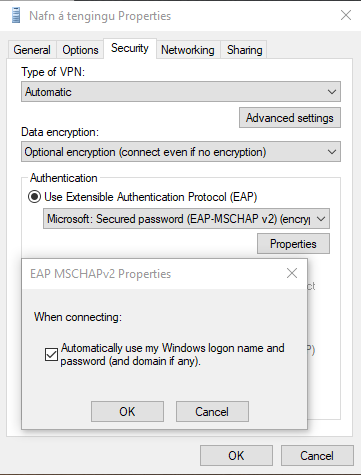
- Smellið á „Security“ flipann merkið við „Use Extensible Authentication Protocol (EAP)“ veljið „Properties“ og hakið við „Automaticly use my Windows logon name and password“ og smella á velja „OK“
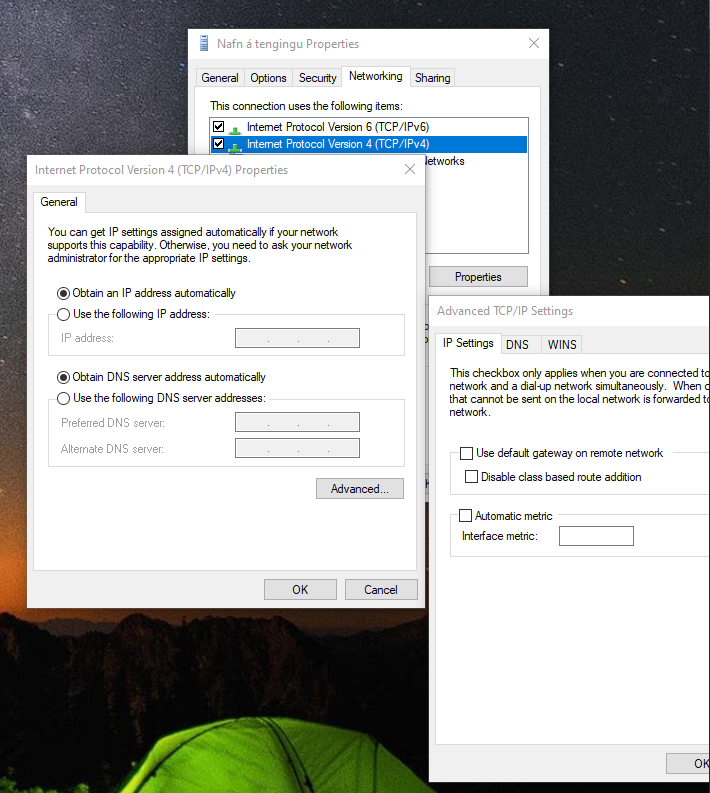
- Næst veljið „Networking“ flipann, smellið á „Internet Protocol Version 4 (TCP/IPv4)“ veljið „Properties„, smellið á „Advanced“ og takið hakið úr „Use dfault gateway on remote network“ veljið „OK“ þar til allar stillingar eru vistaðar.
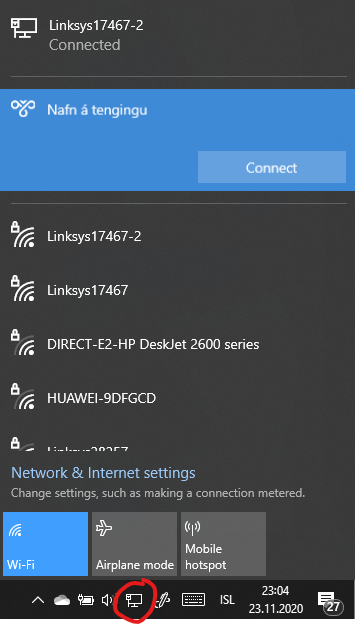
- Nú ertu tilbúinn til að tengjast sem er hægt að gera frá taskbarum með því að smella á nettengi merkið velja tenginguna og smella á „Connect“
Nýlegar athugasemdir